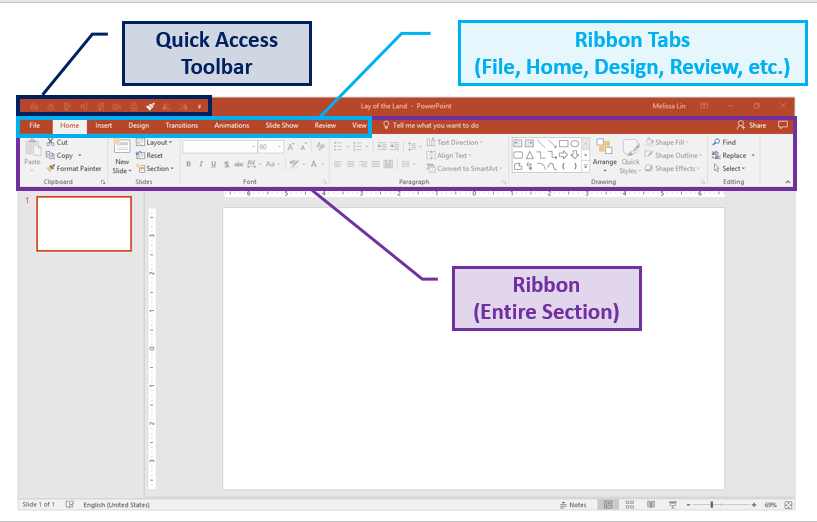
The first step to becoming a PowerPoint expert is building your Quick Access Toolbar. It’s a customizable toolbar sitting above the ribbon, where you can add your favorite and most frequently used commands. Invest five minutes to set it up, and you won’t regret it - it’ll pay dividends each time you use PowerPoint thereafter. Here’s a quick lay of the land before we delve into the logistics:
To customize your toolbar’s functionality and ordering according to your preference, simply click the white downwards-facing arrow above your ribbon. Then click “More Commands” → Choose Commands from “All Commands” → Select and add your favorite commands. If you want to remove any commands, simply select the command and hit “Remove.”
My “must-haves” for the ultimate quick access toolbar (QAT):
Align: The alignment tool is hands-down my favorite tool in PowerPoint. Bypass the futile, manual effort and instead highlight the shapes you want to align, and choose which direction to align them. You can align objects to the middle, right, left, top, and bottom of each other. Keep in mind that the positions of the objects are all relative to each other.
If you want to use this tool outside of your QAT: Highlight your desired objects → Format tab in the ribbon → Click Align → Select your preferred alignment direction → The objects will be aligned.
Distribute: If you have multiple objects or shapes that you want to make equidistant from each other, this tool will be your new best friend. Before distributing objects, it’s best to first align them. Then, to distribute, simply highlight the objects you want to distribute, and select “distribute horizontally” or “distribute vertically.”

If you want to use this tool outside of your QAT: Highlight your desired objects → Format tab in the ribbon → Click Align → Select Distribute Horizontally or Distribute Vertically → The objects will be distributed.
Format painter: Allows you to copy the formatting from one object and apply it to another one. It is essentially copying and pasting, but for formatting and not content.
- One click on format painter: Applies the formatting from the original object to the next object you select/click on.
- Two clicks on format painter: Locks in the format painter. After double-clicking, any object you select will convert to the formatting of the first object. To unlock format painter, click on any white space on the slide (not an object).
If you want to use this tool outside of your QAT: Select the object you want to mimic → Click Format Painter once or twice in the Home tab in the ribbon → Click on the object you want to change → The formatting changes will be applied.
Rotate: As the name implies, this feature enables you to rotate objects, in increments of 90 or 180 degrees. You can rotate a text box, shape, WordArt, or picture. This includes rotations to the right 90 degrees, to the left 90 degrees, vertically, and horizontally.
If you want to use this tool outside of your QAT: Highlight your desired object(s) → Format tab in the ribbon → Click Rotate → Select your preferred rotation option → The objects will be rotated.