How to convert text to SmartArt
Example Situation: I’ve got a list of boring bullets and I need inspiration to make them more polished.
Solution: Leverage the “Convert to SmartArt” tool.
Select the text box with the bullets → Under “Home” in the ribbon, Select “Convert to SmartArt” → Hover over different SmartArt options to see your bullets transformed → Select whichever SmartArt strikes your fancy, and continue to edit from there
How to Resize Multiple Objects/Shapes at Once
Example Situation: I used multiple shapes/images in the slide and I want to change their collective size without messing up the proportions.
Solution:
First, group all the objects together. To group, highlight all objects and either right click → Group, or highlight and hit ALT + G.
Then, adjust the size with your mouse while holding SHIFT to keep the proportion. This will help you resize and fit multiple objects without distorting the original proportions and shapes.
How to Identify and Match Exact Colors
Example Situation: You need to utilize a specific, custom color but you can’t seem to find it in the color palette.
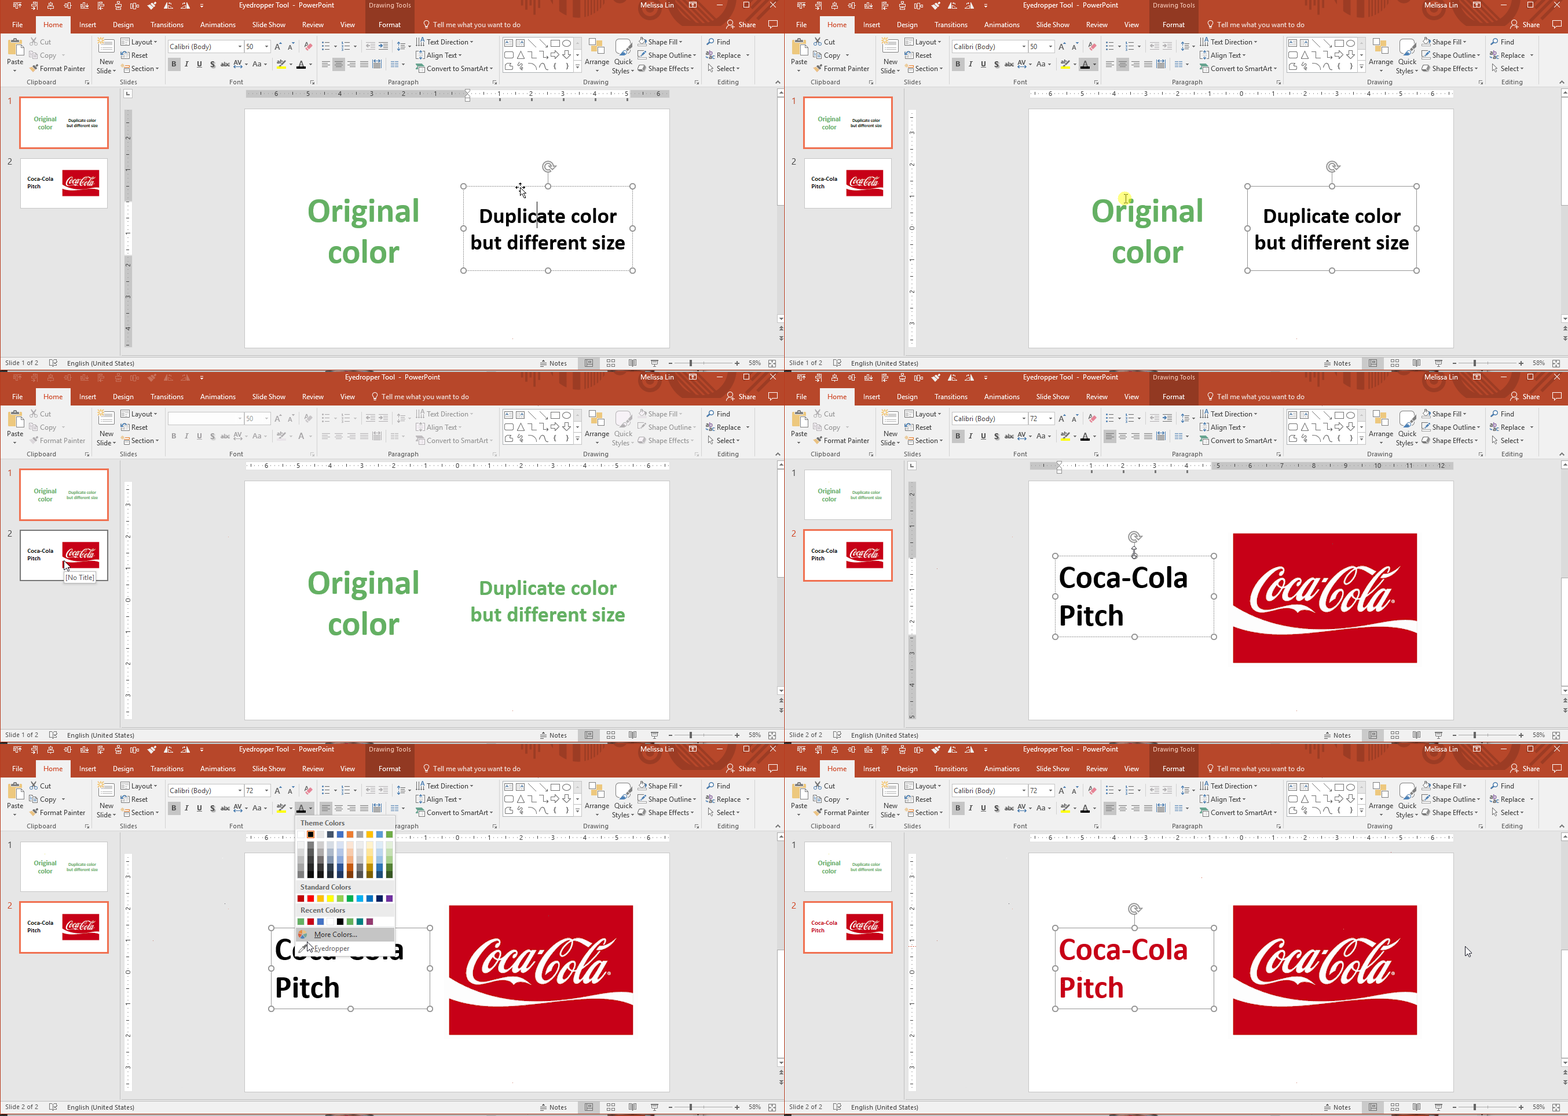
Solution: The eyedropper tool quickly identifies the exact color you are looking to match, and applies it to the text or object you are trying to change. While format painter can be helpful for applying the exact same formatting (size, coloring, etc.) from one object to another, sometimes you might only be looking to apply the same color. In these cases, the eyedropper tool is very helpful.
A common use case for this tool is for pitch decks. If you are looking to match the theme of the deck to the potential client/partner’s logo, the eyedropper tool can prove invaluable.
- Select the text box you want to change → Click on the coloring format → Select the eyedropper tool → Using the eyedropper tool, hover over the color you want to mimic → When the color’s identification appears, click the color you want
How to Leverage Arrows with Elbow Connectors
Example Situation: I’m trying to draw arrows from one shape to another, but the arrows are crooked and look unprofessional.
Solution: Use the arrows with an elbow connector (90-degree angles). They automatically snap to the center of an object and can be formatted in different colors and sizes. These are especially helpful when building organizational charts.
- Go to the Insert ribbon → Insert a shape → Under the “Lines” category, select the arrows with elbow connectors → Once selected, use the arrow to connect the center of one shape to the center of another shape → Repeat until completion
How to Fit Text into a Shape
Example Situation: I’m typing a text label into a shape, but the text doesn’t fit and breaks the word into two lines.
Solution: There are two ways to go about it:
- Option 1: Right-click the shape → “format the shape” → Change the text margins to “0” from the left, and “0” from the right. Nine times out of ten, this will solve your issue.
- Option 2: Forget about dealing with the original shape. Instead, insert a text box over the original shape (text box should use a transparent background) and type directly into the text box. The text will show up over the shape, but nobody will know it was a manual workaround.
How to Remove the Background of a Picture
Example Situation: I used an image from the web in a slide and I want to change the background image color but can’t figure out how to do it.
Solution: This technique is most effective when used on images with high contrast.
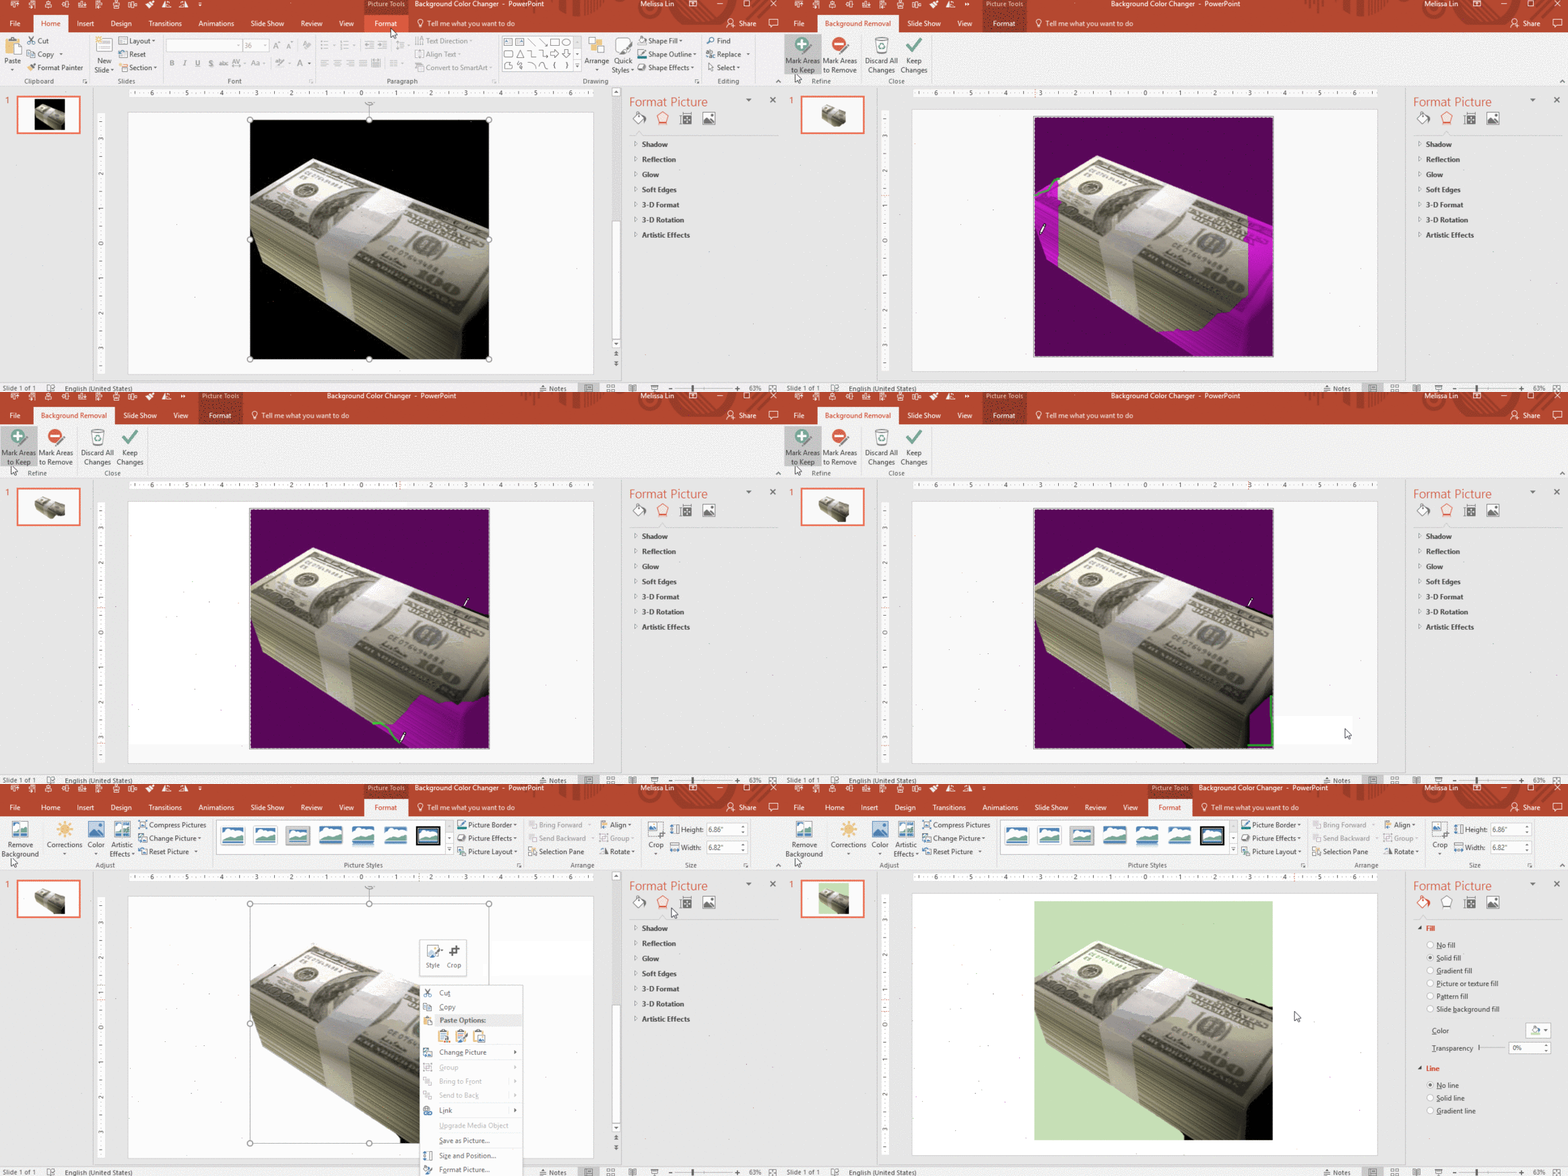
- First, you must remove the original background color of the image. Click on the image you want to change → Select the “Format” tab in the ribbon → Click “Remove Background” → Fix any portions that were not perfectly removed → Click outside the image when you’re ready
- Next, you will want to add in the new background color of the image. As you can see, the perfect execution of this does require a steady hand (that I clearly do not quite have). Still, it’s a helpful trick to have in your back pocket.
How to Convert a Table to Text Boxes
Example Situation: You want to convert a datatable into different formatting on another slide, but you don’t want to manually type the numbers in and risk a mistake.
Solution: Break your table into multiple text boxes and objects, which saves you the trouble of retyping the data and will be easier to manipulate
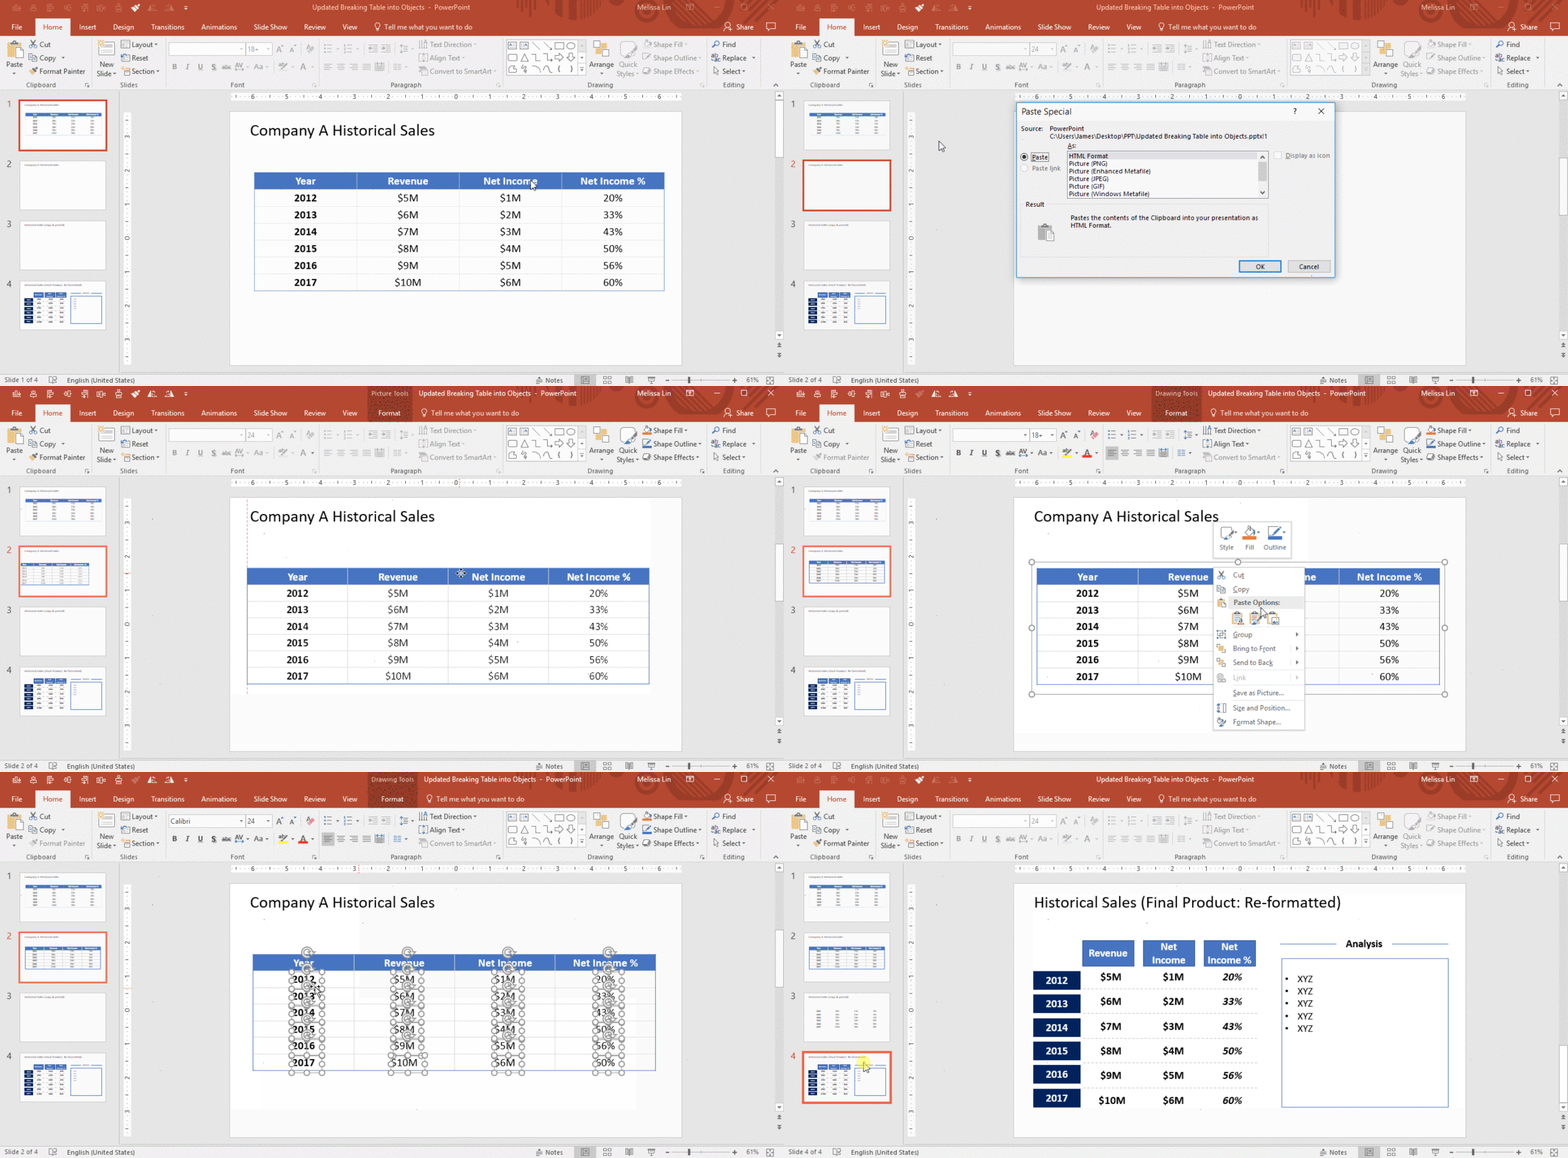
- Copy the entire table → Paste special (paste as picture enhanced metafile) → Ungroup it → Answer “yes” to the dialog box → Ungroup it again → Answer “yes” again.
- Voila, now your table has been broken into text boxes and shapes. You can now copy and paste the data you need into another slide and re-format as you like.
How to Make a Table’s Rows or Columns the Same Size
Example Situation: You’ve created and filled a table with data, but the size of some rows or columns do not match the others. Your OCD starts to kick in but you can’t figure out how to get them to match perfectly.
Solution: Use the “Distribute Rows” and “Distribute Columns” tools.
- Select the entire data table → “Layout” tab in the Ribbon → Click “Distribute Rows” and “Distribute columns.”
