Use description templates when creating events
If you’re using Outlook Calendar for work purposes, chances are you’re creating many events – especially if you’re a team lead or a manager. And it can feel burdensome to write event descriptions each time you add a new event to the Calendar.
While it may not take up too much time of your workday, small tasks still take your energy, and it’s nice to have a way of automating them.
Good news – you can create and use event description templates on Outlook Calendar instead of writing event descriptions every time from ground zero. Here’s how this simple Outlook Calendar tip works.
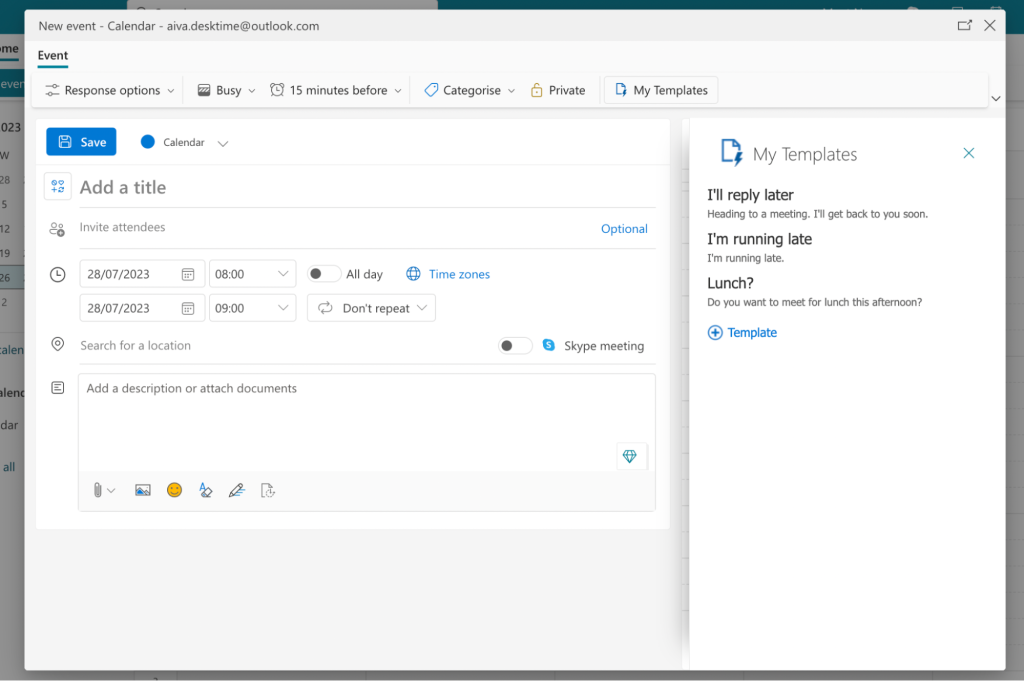
Hit the New event button on the upper left side of your Calendar view. A pop-up window will open where you can add all the event details, such as date, time, location, and the event description.

Now, find My Templates on the right-ish side of the window and click it. An additional section will appear on the right side, offering you a few example templates and an option to add a new one yourself. Click +Template.
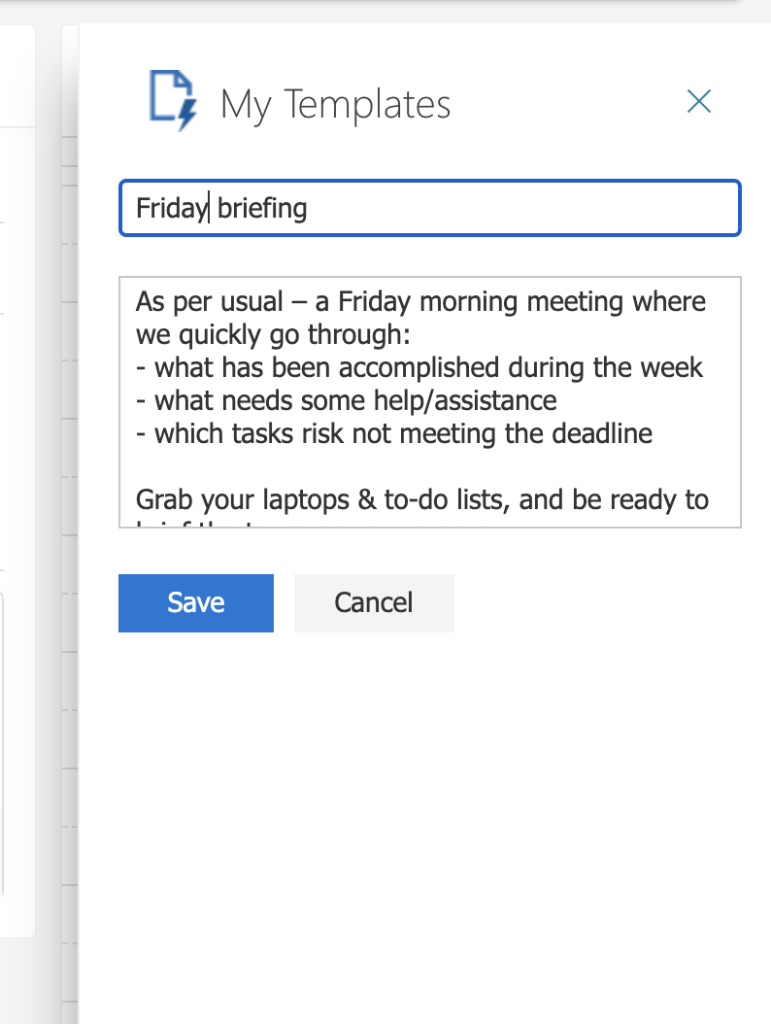
Now you can add a new event description template – name it and add the needed description.

When you’re done, hit the Save button, and the newly created template will appear on the templates list. To add it to your event, just click on the template, and it will pop into place.